As one would expect, the fit and finish of all parts was excellent. The installation was very easy and took only a few minutes. I've posted pictures of the install to my FLICKR account. Despite the extended appearance, the mount is still rigid. I had to wait a few days to test the mount due to weather. The mount performed flawlessly and I enjoyed being able to track well past the meridian without colliding with the mount. An excellent addition to my mount. In my opinion, this option should come standard on the mount.
Saturday, May 14, 2016
Losmandy G-11 RA & Dec extension kit
One of the challenges with the Losmandy G-11 mount is that when tracking past the meridian, the saddle plate can impact the RA motor. To mitigate this issue, at least partially, Losmandy offers a RA Extension kit. This kit adds 1.5" to the RA body and also raises the Saddle Plate by 0.6". I've had the kit sitting in the box for months. While setting the scope back up after returning from the Deep South Spring Scrimmage seemed like the perfect time to install this kit.

Sunday, March 27, 2016
My Favorite Red Lights
One of the first accessories that most amateur astronomers pick up is a flashlight with a red bulb and/or red filter to preserve their night vision. I have a variety of red lights. Some are basic flash lights designs and some are small clip on lights that fit on the brim of a cap. These are very handy when working on the scope as they aim the light directly at what you are working on. But where I struggled was a having a little bigger battery powered light for reading finder charts and star atlas while observing. My wife stumbled across a light she thought I would like and bought me a couple of the Beam n Read ® LED 6 Hands-Free Pilots Night Vision Light. They have quickly become one of my favorite red lights.

This light has 6 red LEDs plus a red filter and runs off of 4 AA batteries. The light is bright enough to read with but is not overly bright. It has a strap to wear the light around your neck, but I rarely do so. I prefer a light mounted on the brim of my cap when working, but when reading this light is great. It has two positions to illuminate the right spot.


These lights are also available from Amazon.
-------------------------------------------
As I said earlier, when working at the scope I like a red light mounted on the brim of my cap. I've tried several such lights and the one I like the best is the Bushnell H65L. This little light has red and white lights, as do many such products. However what I like about this one is it has separate switches for the red and white lights and the red light switch is on the Right ! So I can avoid blinding myself or others at star parties by hitting the wrong switch. Even I can remember Right = Red.


I'm sure these are available at many places but I got mine at Walmart.
The last light I'll share is one that my wife picked up for me from Amazon. These flexible neck, clip on, red lights are small and very flexible so you can position the light right where you need it.
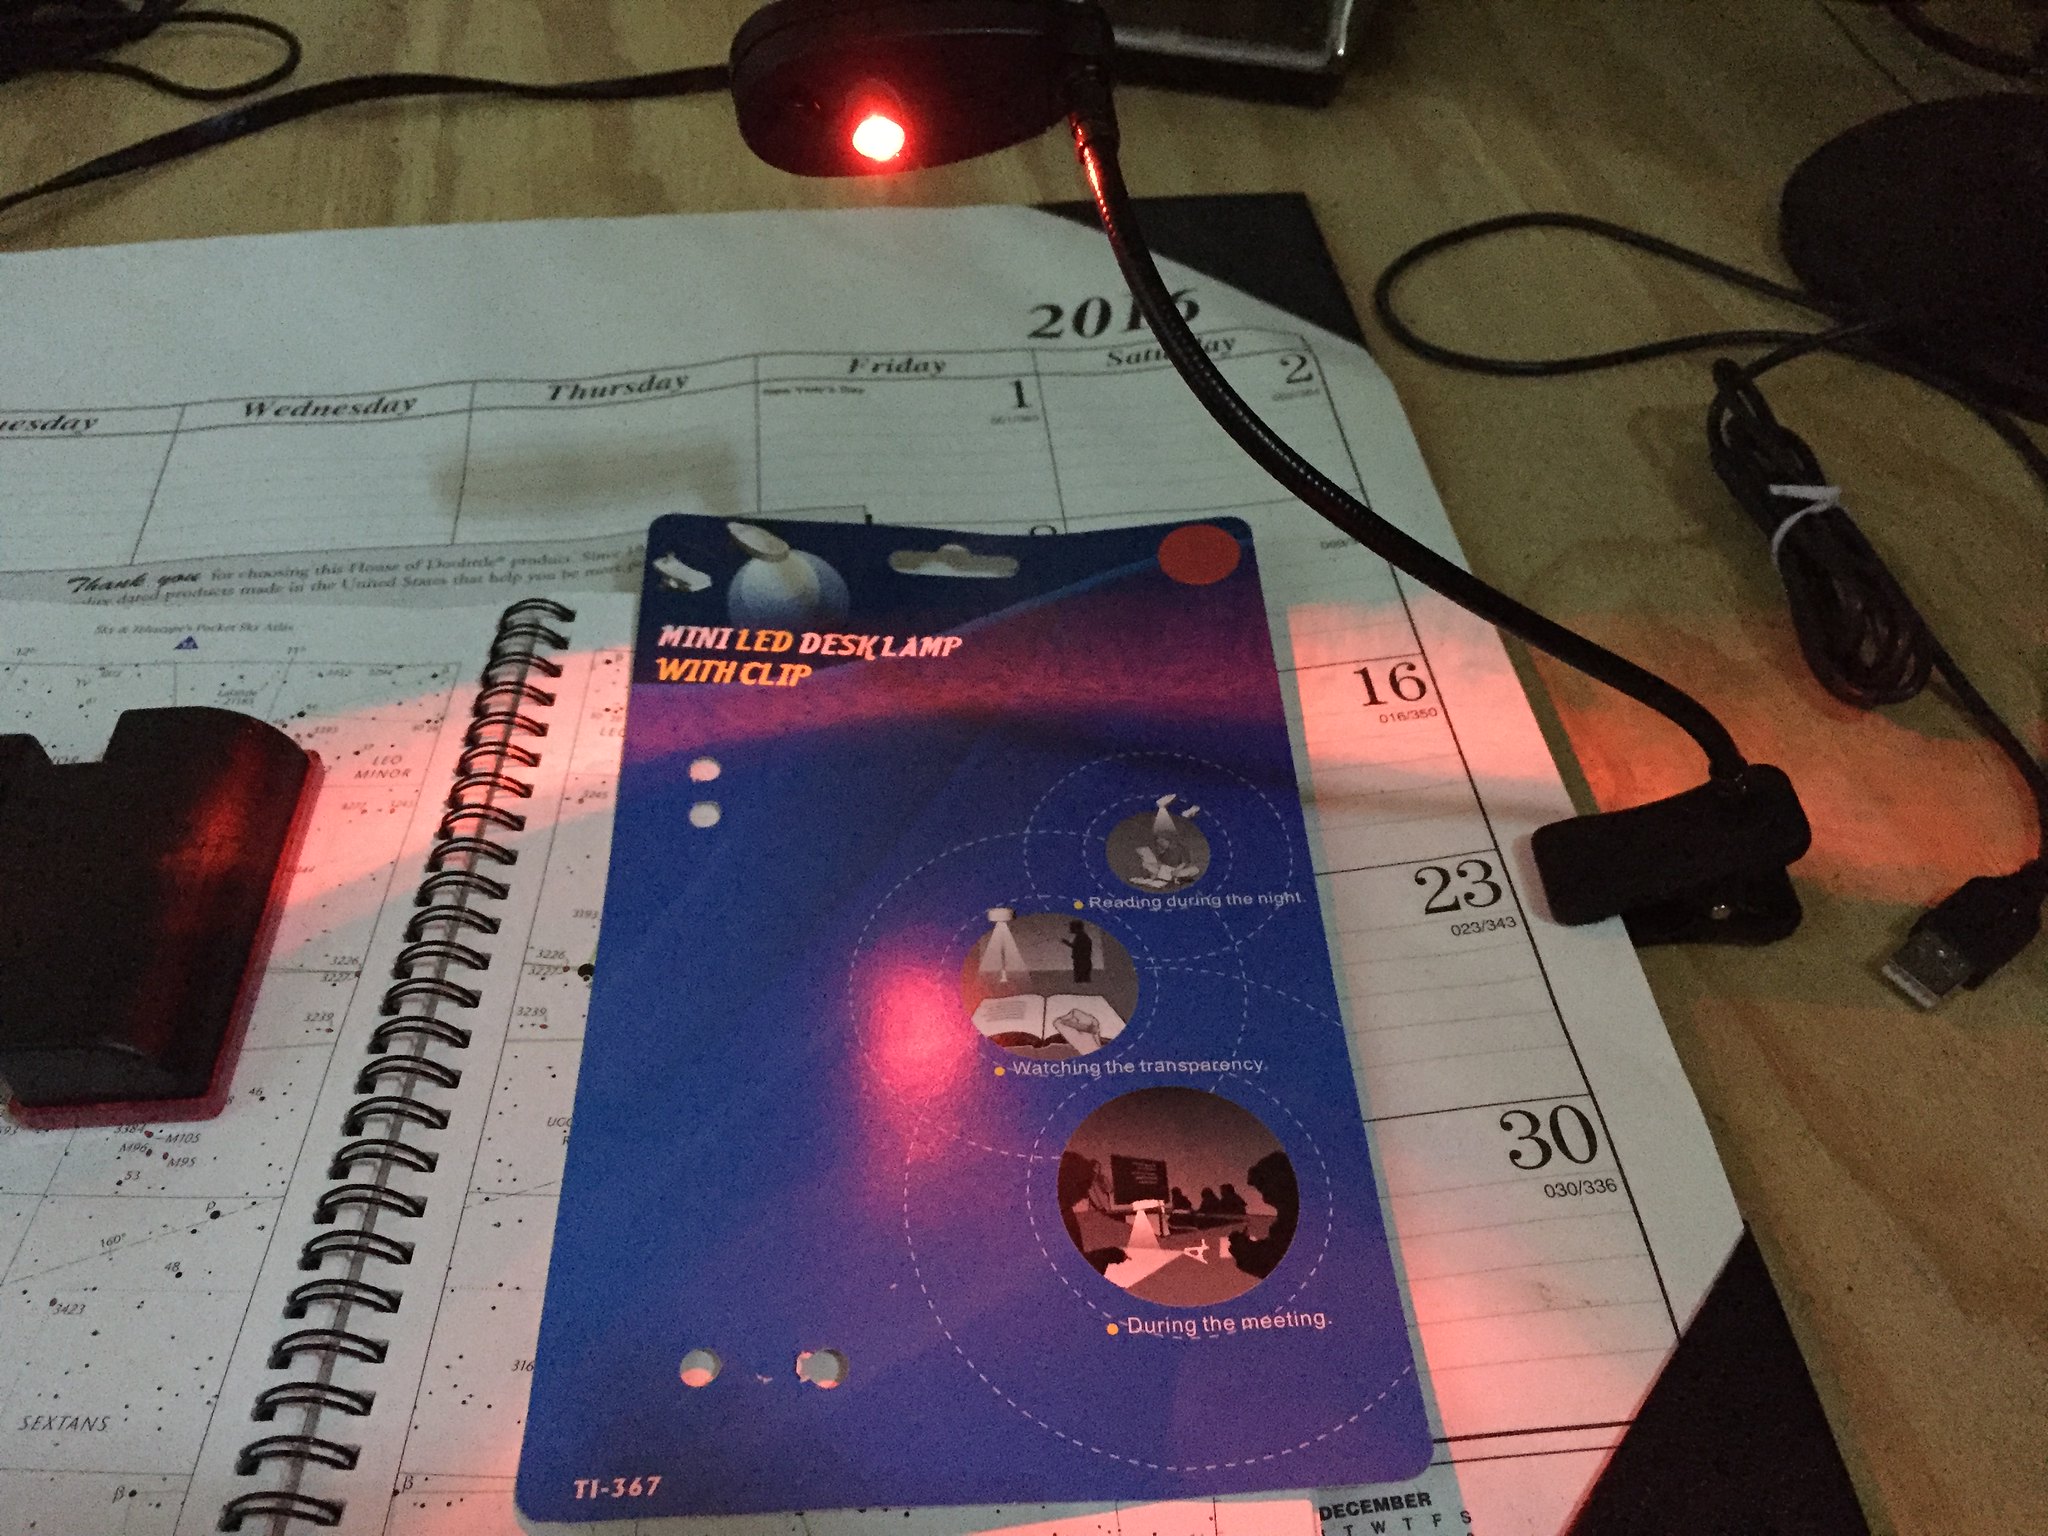
I do find the illuminated spot to be quite small so to read a star chart I have to move the light around. For reading star charts or books I prefer the larger 6 LED light discussed above, but I'm sure I'll find use for these as well.

If you are in need of a red light, give one of these products a try I think you will enjoy them.
This light has 6 red LEDs plus a red filter and runs off of 4 AA batteries. The light is bright enough to read with but is not overly bright. It has a strap to wear the light around your neck, but I rarely do so. I prefer a light mounted on the brim of my cap when working, but when reading this light is great. It has two positions to illuminate the right spot.


These lights are also available from Amazon.
-------------------------------------------
As I said earlier, when working at the scope I like a red light mounted on the brim of my cap. I've tried several such lights and the one I like the best is the Bushnell H65L. This little light has red and white lights, as do many such products. However what I like about this one is it has separate switches for the red and white lights and the red light switch is on the Right ! So I can avoid blinding myself or others at star parties by hitting the wrong switch. Even I can remember Right = Red.


The light is small and lite so it won't weigh down your hat.

The light also tilts so you can point it directly at what you are working on.

I'm sure these are available at many places but I got mine at Walmart.
The last light I'll share is one that my wife picked up for me from Amazon. These flexible neck, clip on, red lights are small and very flexible so you can position the light right where you need it.
I do find the illuminated spot to be quite small so to read a star chart I have to move the light around. For reading star charts or books I prefer the larger 6 LED light discussed above, but I'm sure I'll find use for these as well.
If you are in need of a red light, give one of these products a try I think you will enjoy them.
Sunday, February 28, 2016
January 2016 Observing Report
The point in building an observatory in my backyard was to be able to use my equipment to observe more frequently. So how is that going - GREAT ! Five observing sessions in January.
January 3, 2016
Opened the roof at 7:15 pm to the first clear night in a week. Hope to get in a couple of hours viewing, but can't stay up too late as I have to work tomorrow. It's a chilly 50 F with only a slight breeze. Powered up the camera but the Miloslick software doesn't seem to be communicating with it. After several minutes I realized I had the video input set to composite instead of S-video. With that little detail taken care of I got to observing. Using my Mallincam VRC-10 CF, a Mallincam 2" 0.75 focal reducer, Lumicon Deep Sky filter, and my Mallincam XT-418 camera, The first target - the Andromeda Galaxy, Messier 31.


January 3, 2016
Opened the roof at 7:15 pm to the first clear night in a week. Hope to get in a couple of hours viewing, but can't stay up too late as I have to work tomorrow. It's a chilly 50 F with only a slight breeze. Powered up the camera but the Miloslick software doesn't seem to be communicating with it. After several minutes I realized I had the video input set to composite instead of S-video. With that little detail taken care of I got to observing. Using my Mallincam VRC-10 CF, a Mallincam 2" 0.75 focal reducer, Lumicon Deep Sky filter, and my Mallincam XT-418 camera, The first target - the Andromeda Galaxy, Messier 31.

Next up, Messier 110, a companion galaxy to Andromeda.

Next on my hit list is NGC 147 a galaxy in Cassiopeia. This is an object I've never seen before. The G11 mount slewed to the spot and nothing was there. I slewed to Schedar and aligned the mount. Back to NGC 147 - nothing. This was my third attempt to observe this object. After several more attempts I shut
down at 1050 pm.
January 9, 2016
Opened
the observatory about 6:30. Clouds are to roll in around 9
– 10, so don't have a lot of time. I
spent some time working on the counter weight
down position for the scope. I had noted the other night that
the scope's axis was off set from the mount's Right Ascention (RA) axis. I looked
again at the Losmandy video on setting this position and I used a
small level just as he did to ensure the RA axis was a vertical as
possible. Then I found that the Dec axis setting, using the built-in
level was easy to carefully set. Then when viewed from behind the
scope and mount's RA axis are aligned. This may have been a problem
with my prior observing session and poor gotos and tracking.
I
fired up the mount and did a 4 star alignment. I then slewed to several
stars and bright deep sky objects and all were in the FOV in 11 and
18 mm eyepieces. The goto accuracy seemed to be better than it was the previous
session. Got nice views of M42, NGC 457, M31, Castor (a nice double
star), The Double Cluster (NGC 884) is really nice in the Explore Scientific 30 mm
eyepiece (82 degree FOV).
By
8 the wind really picked up and was blowing things around. It was
nice being inside as it at least partially shielded me and the scope
from the wind. The wind brought in the clouds and I shut down a
little before 9 pm. Sure is nice & easy to simply unplug the
electricity, close the roof, put on the turnbuckles, and lock the
door. I love it !!
January 15, 2016
Went out a little after 10 pm as the skies cleared up. A cool damp night. At 0045 it is 53 degrees with no wind, 83% humidity, and 48 degree dew point. I decided
to try using the Mallincam MFR-3 0.64X focal reducer instead of the
2” 0.75 focal reducer as it gives a little faster scope (5.12 vs 6). I had to add a second spacer to achieve focus. Surprised how much it moved the focus plane.
Viewed the Leo Triplet of galaxies; Messier 65 and 66, and NGC 3628. Here is a shot of M 65.

Shut down a little after 1 am so I'd been up since 6. Excited I'm getting more opportunities to view now with the observatory so I don't feel so compelled to stay out as long when I view.
January 17, 2016
Setup
a little after 6 with my daughter Heather. She brought her scope (Celestron Edge HD 1100) over and so we
finally have the observatory populated with both scopes.

You have to watch your step around the tripod legs, wires, and tables, but the 8' x 12' observatory bay is big enough for us to use the two scopes simultaneously.
You have to watch your step around the tripod legs, wires, and tables, but the 8' x 12' observatory bay is big enough for us to use the two scopes simultaneously.
We had a good time visual observing for a couple of hours and then called it a night. It is wonderful to slide the roof closed, unplug the equipment, and lock the door and head inside !
January 29, 2016
Came
out late after dinner around 9:30. A nice cool night with sparse thin
clouds. Around 49 F with 71% humidity and 41 F dew point and no
wind. Experimenting
with the MFR-5 II. I've got both elements on and a
10 mm spacer at the back and the image of Messier 42 (Orion Nebula) has comma shaped stars,
stars with donut holes, although no vignetting, but an overall displeasing appearance. Removed
the 10 mm spacer and it changed the focus plane by an amazing amount.
I had to add another spacer to the focuser to achieve focus. The
comma and donut stars are gone, replaced by a nice flat field. The shot below is a 20 second exposure to pickup the wispy gas and also Messier 43, but at the expense of totally blowing out the center of the nebula.

I notice on the histogram I'm getting a broad band of signals
instead of a concentrated smooth curve. Seems like a lot of noise –
dirty optics ?

Clouds became more numerous around 1245 so I shut down for the night.
January 2016 Summary
January 2016 Summary
The observatory is so convenient. It allows me to view much more often and without the hassle of setting up and tearing down. I now spend more time actually observing objects and trying different equipment setups and techniques. I look forward to many peaceful nights viewing through my window of the universe.
Saturday, January 2, 2016
Luling Skies Observatory, First Light
Friday Dec 18 provided clear skies and a wonderful opportunity for my first viewing in my new observatory. The roof rolls off smoothly to offer a wide open view of the sky. At 80" above the floor, the walls are higher than in most observatories, but in my light polluted backyard the walls provide a much needed light block from nearby streetlights.

Here is an inside view. I haven't built any shelves yet so my gear is piled on the floor and a table.

Here is my Mallincam VRC-10 CF ready for a night of visual observing. My daughter Heather came over and we had a great time until clouds rolled in a little after midnight. The observatory worked out well and was a big improvement from setting up in the yard.

On Saturday night, December 19, I slid my Mallincam XT-418 into the scope's focuser. With this scope and no focuser rings installed, I've learned that I cannot achieve focus using the Mallincam 2" 0.75 focal reducer. After some experimentation, I've found what works is placing a Baader Planetarium 2" Deluxe Clicklock Eyepiece Extension in the focuser, then the Mallincam 2" 0.75 focal reducer followed by a Baader Planetarium 2" / 1.25" Clicklock Reducer, and then the camera with a Lumicon Deep Sky Filter threaded onto the nose piece.

After getting the equipment running, I had some difficulty with a newly updated version of the Miloslick Mallincam control software. I finally got it figured out and went to the Orion nebula as my first object. I've gotten better pics previously, but this is the best I could manage on this night. Given the size of the object I needed further focal reduction, but with clouds threatening I didn't take the time to change my setup.

I viewed the flame and horsehead nebulas and the Pleadies before clouds rolled in and ended my observing session. It was a pleasure to simply shut down the electricity, close the roof, and head inside. Much better than spending the next hour tearing down the equipment and stowing it away. I look forward to many more observing sessions in my backyard observatory.

Here is an inside view. I haven't built any shelves yet so my gear is piled on the floor and a table.

Here is my Mallincam VRC-10 CF ready for a night of visual observing. My daughter Heather came over and we had a great time until clouds rolled in a little after midnight. The observatory worked out well and was a big improvement from setting up in the yard.


After getting the equipment running, I had some difficulty with a newly updated version of the Miloslick Mallincam control software. I finally got it figured out and went to the Orion nebula as my first object. I've gotten better pics previously, but this is the best I could manage on this night. Given the size of the object I needed further focal reduction, but with clouds threatening I didn't take the time to change my setup.

I viewed the flame and horsehead nebulas and the Pleadies before clouds rolled in and ended my observing session. It was a pleasure to simply shut down the electricity, close the roof, and head inside. Much better than spending the next hour tearing down the equipment and stowing it away. I look forward to many more observing sessions in my backyard observatory.
Friday, January 1, 2016
Luling Skies Observatory Construction, Day 2
After heavy rains on Wednesday, the skies cleared and the crew got an early start to complete the observatory on Thursday Dec 17. First task at hand were the 4" x 4" supports for the roof rails. The posts sit on 10" diameter concrete footers.


The roof was assembled from trusses on 24" centers with a 2" x 4" side rails. The roof profile is a shallow 1 x 12 pitch so that the roof blocks as little of the sky as possible. The use of such a shallow roof pitch is possible as we have no concern with snow accumulation in my Southeastern Louisiana location.

Here the first of the v-groove rollers is added. The v-groove wheels and track were obtained from Gate Depot. For the 8' x 16' metal roof we used 3 wheels on each side. The 4" diameter v-groove wheels have double bearings and roll very smoothly. The wheels ride in a metal box .


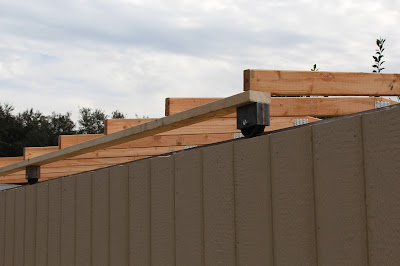


The roof rolls easily when pushed by hand, but using a 4' long 2" x 4" "pusher" makes the job easier.

At the end of the second day, the observatory was complete except for door sills and stops on the roof rails. The important thing for now is I have a functional observatory ! In the days to come I need to install fittings to secure the roof, shelving, complete the electrical wiring, add lighting, etc, etc, etc..

Next came the 4" x 4" rails.

The rails and supports are constructed of pressure treated lumber.

The roof was assembled from trusses on 24" centers with a 2" x 4" side rails. The roof profile is a shallow 1 x 12 pitch so that the roof blocks as little of the sky as possible. The use of such a shallow roof pitch is possible as we have no concern with snow accumulation in my Southeastern Louisiana location.

Here the first of the v-groove rollers is added. The v-groove wheels and track were obtained from Gate Depot. For the 8' x 16' metal roof we used 3 wheels on each side. The 4" diameter v-groove wheels have double bearings and roll very smoothly. The wheels ride in a metal box .


Here is the heavy duty track that the v-groove wheels ride on. Note that because of the width of the "ears" on the track, a 2 x 4 had to be screwed to the inside of the roof header and the roll off rails.

With the floor nearly 12" above the ground and 80" high walls, these guys were really stretching to hoist the roof frame into place.

With the help of a third worker on a ladder, they set the wheels on the track.

Attaching the roof decking and then will come the metal sheeting.

Fascia added to the sides of the roof to cover the wheels.

As night fell, they crew kept working to complete the job.

The roof rolls easily when pushed by hand, but using a 4' long 2" x 4" "pusher" makes the job easier.

At the end of the second day, the observatory was complete except for door sills and stops on the roof rails. The important thing for now is I have a functional observatory ! In the days to come I need to install fittings to secure the roof, shelving, complete the electrical wiring, add lighting, etc, etc, etc..
Tuesday, December 22, 2015
Luling Skies Observatory Construction, Day 1
After months of planning, on December 15, 2015 Tuff Shed finally began construction of my roll off roof observatory. Here is the corner of the yard with the pier and my buried blue conduit for DC power and grey conduit for computer cables. Our Maltipoo Colby is surveying his area.


First came the aluminum floor supports on concrete blocks and wood leveling shims.

Here is a edge on view showing the supports. Note they later added another beam on the left side so the floor is supported at least every 24".

Down goes the rest of the flooring. The frame is secured to the ground with metal straps and an auger on each corner.

They did a nice job cutting the floor with a small gap around the pier. I plan to fill the holes with steel wool to keep pests out. And now for some walls !

Here at the end of day 1 is the finished shell. In this pic we are looking at the eastern side of the building.

An inside view from the eastern doorway. The 8' x 12 ' observatory bay looks large at this point. The interior wall with a rough door and window opening separates the control room from the observatory bay.

Here is a side view of the completed shell from the North.

Here is one of the 10" diameter concrete footers to support the 4x4" legs that will support the roll off roof rails.

On day 2 the roof, roll off rails, and doors will be installed. However heavy rains are forecast for tomorrow so I'll have to wait until Dec 17 for completion.
Friday, November 13, 2015
Blackout EZ Window Covers
When my wife and I attend a star party we prefer to stay in our travel trailer on or near the observing field.


While I'm out viewing my wife stays in the trailer and watches movies or listens to music. It is important to have the trailer windows and skylights covered so that my wife can do her thing with the lights on but avoid having the lights interfere with the viewing. In our old trailer I covered the windows from the inside with aluminum foil. It was effective in preventing light leaking out, but was difficult to remove and reapply. With our new trailer as we prepared to attend the Deep South Regional Star Gaze I was looking for a better solution.
While perusing Amazon.com I came across an interesting product: Blackout EZ window covers. These covers are an opaque fabric that attaches with hook and loop fasteners. They sell these covers in small (36" width x 48" length), large (45" width x 66" length), and custom sizes. I ordered a large kit to try. It arrived in a heavy cardboard mailing tube. Inside was a piece of vinyl fabric that is white on one side and black on the other. The fabric is stiff but flexible. Also in the mailing tube was the hook and loop fasteners with adhesive backing.
The trailer windows came with curtains and a shade. They look nice but I had to remove them to install the Blackout EZ kit.

So with the curtains and shade off I had access to the window frame. Now to install the hook fastener.

The challenge with the rounded windows is to kerf the hook tape to fit around the frame.

It takes some time to fit the tape around the window frame.


With the hook tape attached to the window frame it is an easy matter to measure and cut the fabric. It is easy to cut with scissors and on the black side of the fabric there is a grid that makes cutting in a straight line easy. Then the loop tape is applied to the back side of the fabric.


So with the curtains and shade off I had access to the window frame. Now to install the hook fastener.

The challenge with the rounded windows is to kerf the hook tape to fit around the frame.

It takes some time to fit the tape around the window frame.


With the hook tape attached to the window frame it is an easy matter to measure and cut the fabric. It is easy to cut with scissors and on the black side of the fabric there is a grid that makes cutting in a straight line easy. Then the loop tape is applied to the back side of the fabric.

Attaching the fabric with the hook and loop tape is easy and the result is a nice looking window covering.

Here with the curtains and shade reinstalled, the covering is attractive and doesn't interfere with the operation of the shade.

When darkness fell I had my wife shine a flashlight all around the window on the inside and I stood outside looking for any light leakage. There was none. I was sold and the next day I ordered enough material to do all the windows, skylights, and door in the trailer. It took 3 of the large kits to cover the 6 windows, 2 skylights, and door. For the two large picture windows, I bought 2 custom pieces. The kits come with the hook and loop fastener but I found for the large kits I needed additional fastener tape.
It took me several hours to get the openings in the trailer all covered, but I am quite satisfied with the results. It looks good and is effective. You can easily pull the fabric back when you want to look out the window and then firmly reattach the fabric. When not at star parties we can peel the fabric partially back or even pull it totally off, roll it, and store it away. The reverse process to reattach is quick
So how did it do at the Deep South Regional Star Gaze? Fantastic ! My wife enjoyed being able to have the lights and TV on without bothering the astronomers who were just 30 feet away. We are happy with the purchase and highly recommend it. Check it out.

Subscribe to:
Posts (Atom)